
Orchid Care
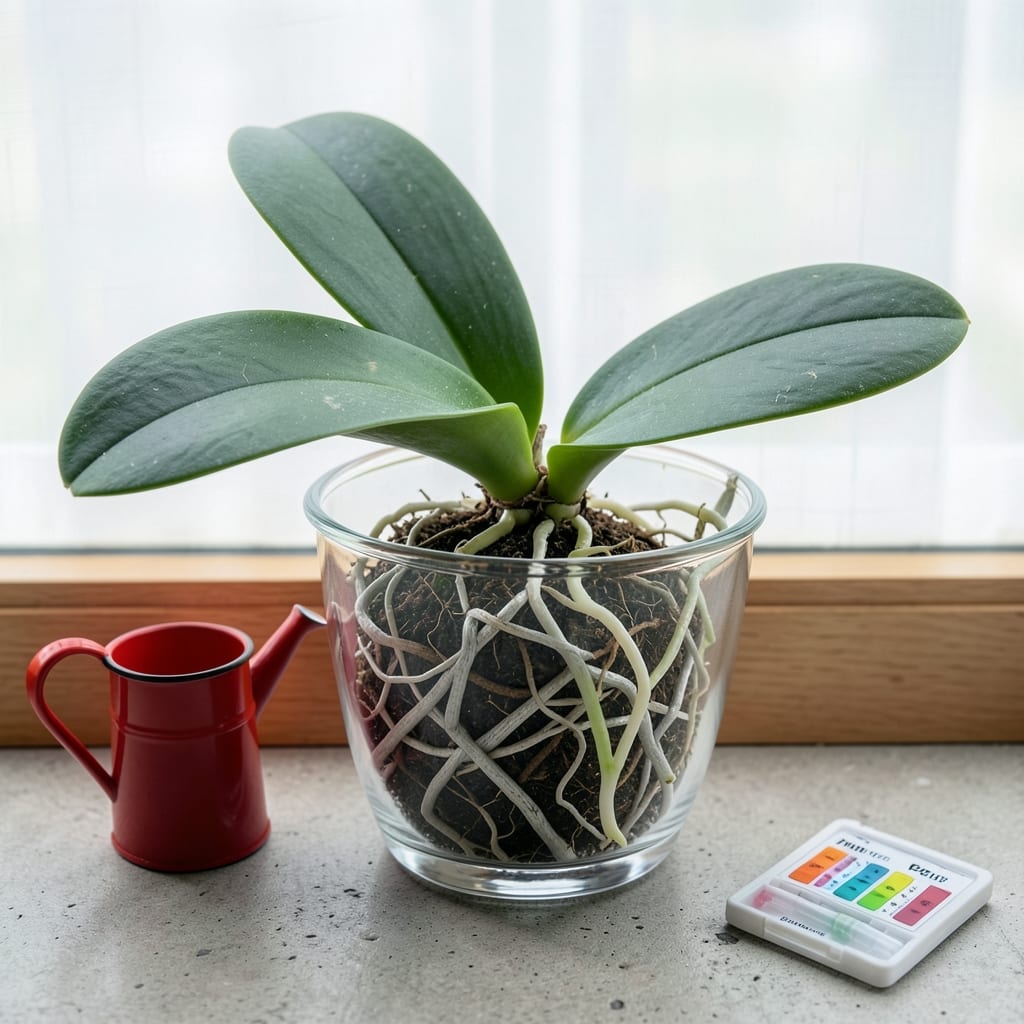
If you’ve ever stared at your orchid’s bare roots and wondered how long for orchid to grow new roots, you’re not alone—this is one of the most common questions among plant parents. The truth? Healthy roots typically emerge within 4 to 8 weeks, but the timeline can feel like an eternity when you’re eager to see progress.
Root growth isn’t just about waiting—it’s about creating the perfect conditions. Too much moisture, poor airflow, or weak light can stall development, leaving you frustrated. The good news? Small tweaks—like adjusting humidity or repotting with the right mix—can make a huge difference in speeding things up.
In this guide, I’ll walk you through the exact stages of orchid root regrowth, the signs to watch for, and 5 proven tips to accelerate the process naturally. Whether your orchid’s roots are slow to respond or you’re troubleshooting a stalled plant, you’ll leave here with actionable steps to get those roots thriving.
Let’s turn that waiting game into a success story—your orchid’s next bloom might just depend on it.


Orchid root growth timeline: week-by-week breakdown & what to expect
Orchid roots typically take 4 to 8 weeks to regrow after repotting or stress, but this timeline varies based on your plant’s health, environment, and care routine. Understanding the week-by-week stages helps you track progress and adjust conditions for faster growth. Healthy roots are your orchid’s lifeline—they absorb nutrients and water while anchoring the plant.
In the first 2 weeks, focus on creating ideal conditions: bright indirect light, 60% humidity, and lukewarm water soaks. Avoid direct sun or drafts, which can shock delicate roots. New root hairs begin forming during this phase, but they’re invisible to the naked eye. Patience is key—rushing can damage tender growth.
By week 3, you’ll notice subtle changes if your orchid is thriving. Look for tiny white or silvery root tips emerging from the base or rhizomes. These are the first signs of new growth. Increase airflow around the pot by spacing plants apart, but avoid strong fans that dry roots too quickly. A glass jar humidity tent (with small air holes) can help maintain moisture levels.
Weeks 4 to 6 are the most critical for visible progress. Healthy roots should thicken and turn green or silvery-green when hydrated. Use a clear plastic pot to monitor root development without disturbing the plant. If roots remain shriveled or brown, adjust your watering schedule—overwatering is the #1 killer of orchid roots. Aim for soil to dry slightly between waterings (test by lifting the pot; if it’s light, it’s dry).
| Stage | Root Development | Key Actions | What to Watch For |
|---|---|---|---|
| Week 1–2 | Root hairs form (invisible) | Provide bright indirect light, 60% humidity, lukewarm water | No visible changes; focus on environment |
| Week 3 | White/silvery root tips appear | Increase airflow; avoid drafts | Check for tiny new growth near base |
| Week 4–6 | Roots thicken, turn green/silvery | Water when soil dries; use clear pot for monitoring | Healthy roots plump when hydrated; avoid soggy mix |
| Week 7–8 | Roots develop vascularization (striped pattern) | Reduce water slightly; introduce dilute fertilizer | Strong, flexible roots indicate readiness for blooming |
By weeks 7–8, mature roots should show vascularization—visible striped patterns that confirm they’re absorbing nutrients efficiently. This is when your orchid is ready for light fertilization (use a balanced 20-20-20 at half-strength). If roots stay thin, brown, or mushy, they’re struggling. Common culprits include overwatering, low humidity, or compacted potting mix. Fluff the bark mix gently with a chopstick to improve aeration.
Temperature plays a hidden role in root growth. Orchids thrive in daytime temps of 70–80°F and nighttime drops to 60–65°F. A 5–10°F difference between day and night mimics natural conditions and triggers root activity. Place your orchid near a south-facing window with sheer curtains or under grow lights for 12–14 hours daily. Avoid hot spots like above radiators.
Humidity is another game-changer. Most homes have 30–40% humidity, but orchids need 50–70%. Group plants together, use a pebble tray with water, or invest in a humidifier near your orchid collection. Mist leaves daily in the morning to prevent fungal issues, but avoid wetting the crown. A hygrometer ($10 at garden centers) helps monitor levels—aim for 60% or higher during root growth.
If your orchid’s roots take longer than 8 weeks to regrow, don’t panic—but act. Reassess your potting mix (should be chunky bark, not moss-heavy), watering habits (never let roots sit in water), and light exposure. Some orchids, like Phalaenopsis, are slower growers, while Cattleyas may sprout roots in 3–4 weeks with ideal care. Adjust expectations based on your orchid’s species and maturity.
Celebrate small wins! Even 1/4-inch new growth in 4 weeks is progress. With consistent care, your orchid’s roots will strengthen, leading to longer bloom spikes and vibrant flowers. Next, we’ll explore 5 proven ways to speed up root growth—without chemicals or shortcuts. 🌱
Orchid root growth timeline: week-by-week breakdown & what to expect
New orchid roots typically emerge within 2 to 4 weeks after repotting or stress, but full development takes 4 to 8 weeks—this is completely normal. The first signs appear as tiny, fuzzy root hairs along the rhizome, which are your orchid’s way of seeking moisture and nutrients. Think of this early stage like a baby’s first steps: slow but full of potential.
By week 3, healthy roots should show visible thickening and a slight greenish tint when hydrated. This is when they start absorbing water through their velamen layer, a spongy outer coating that’s key to orchid survival. If yours aren’t progressing, check your light levels—too little light stalls growth, while too much can scorch delicate roots.
| Stage | Root Characteristics | What to Do |
|---|---|---|
| Week 1-2 | Fuzzy white root hairs appear | Maintain 60% humidity and bright indirect light |
| Week 3-4 | Roots thicken, turn slightly green when wet | Water every 7 days with room-temp water |
| Week 5-6 | Roots develop vascular tissue (silver-green streaks) | Introduce balanced fertilizer (diluted) |
| Week 7-8 | Roots fully functional (thick, green when hydrated) | Reduce watering slightly; monitor for flower spikes |
At week 5, you’ll notice roots developing vascular tissue—visible as silver-green streaks that indicate healthy internal structure. This is when roots become truly functional, able to transport water and nutrients efficiently. If your orchid’s roots stay thin and white beyond this stage, it’s likely underwatered or lacking proper air circulation.
By week 7-8, healthy roots should be thick, green when hydrated, and firm to the touch. They’ll also develop a slightly wrinkled texture when dry, which is normal. If roots remain shriveled or mushy, it’s a red flag for overwatering or root rot. At this stage, your orchid is ready for normal care routines, including regular fertilizing to support blooming.
Remember, orchid root growth varies by species—Phalaenopsis (moth orchids) typically root faster than Cattleya varieties. Factors like temperature consistency (65–80°F), humidity levels, and proper potting mix (bark-based) can cut growth time by up to 2 weeks. Always repot in spring to align with natural growth cycles.
Pro tip: Use a clear glass pot to monitor root progress—you’ll spot new growth instantly and adjust care accordingly. Patience is key, but with the right conditions, your orchid’s roots will thrive in 6 to 8 weeks, setting the stage for stunning blooms. 🌱